You’ve just unboxed your new iPhone. Whether it’s the latest model or a slightly older upgrade, the setup process is your first opportunity to shape how the device will serve you for years to come.
Apple has made activation straightforward, but making smart decisions during setup can improve performance, privacy, battery life, and long-term satisfaction. Instead of rushing through screens, take a few minutes to approach the process intentionally.
Before you begin, have the following ready:
- Your previous phone (if upgrading)
- Your Apple ID and password
- Wi-Fi network details
- SIM card or eSIM access information
- A charger, just in case setup takes time
Preparation makes everything smoother.
Step 1: Back Up Your Old Phone First
If you’re upgrading from another iPhone, backing up your old device ensures nothing important is lost.
On your current iPhone:
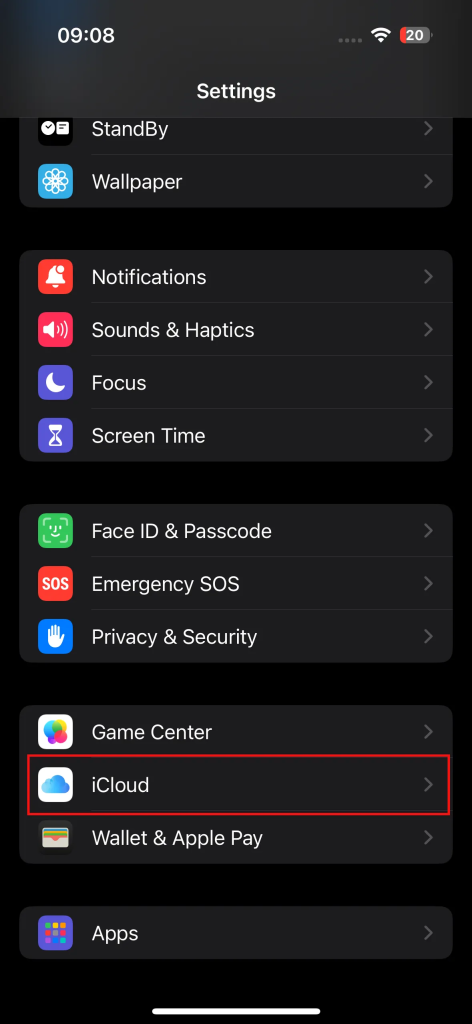
- Open Settings
- Tap your name at the top
- Select iCloud
- Choose iCloud Backup
- Tap Back Up Now
Wait until the backup completes before starting the new device.
If you’re moving from Android, you can still prepare ahead of time by backing up your contacts, photos, and messages to Google services. During setup, you’ll have the option to transfer much of that data directly.
Backing up first protects your photos, messages, notes, app data, and settings.
Step 2: Insert SIM or Activate eSIM
Most modern iPhones use eSIM technology. In some regions, physical SIM slots are still available, while others are fully digital.
If using a physical SIM:
- Use the small SIM ejector tool
- Insert your SIM into the tray
- Reinsert the tray securely
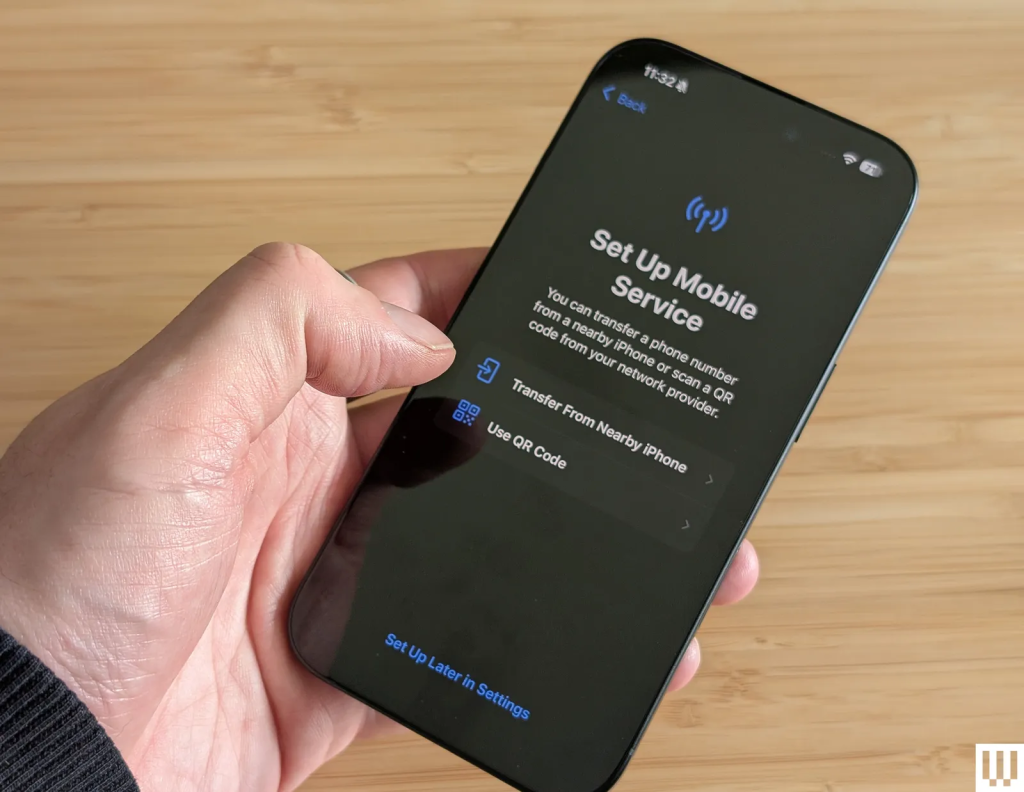
If using eSIM:
- Follow the on-screen prompts during activation
- Confirm transfer from your previous device
- Or scan a QR code provided by your carrier
eSIM activation typically takes only a minute or two. If anything fails, your carrier can quickly assist.
Step 3: Power On and Choose Your Setup Method
Hold down the side button until the Apple logo appears. You’ll see “Hello” displayed in multiple languages.
At this stage, you can choose:
- Quick Start (transfer from another iPhone)
- Set Up Manually (fresh configuration)
Quick Start – Fastest for Upgraders
If you still have your old iPhone:
- Turn on Bluetooth on your old device
- Bring the new iPhone close to it
- Confirm that you want to use your Apple ID
- Scan the animation that appears
- Enter your passcode
This method transfers:
- Apps
- Settings
- Wi-Fi credentials
- Apple Watch pairing
- Messages and photos
It’s the easiest path if you want everything to look and feel identical to your previous device.
Manual Setup – Ideal for a Fresh Start
If you prefer starting clean:
- Select your language and region
- Connect to Wi-Fi
- Set up Face ID
- Create a six-digit passcode
- Choose how to transfer data
You can restore from:
- iCloud Backup
- Another iPhone
- A Mac or PC
- Android
- Or choose Don’t Transfer Anything
Choosing a fresh start can eliminate clutter and improve performance.
Step 4: Set Up Face ID and Security
Face ID is more than convenience—it protects your personal data.
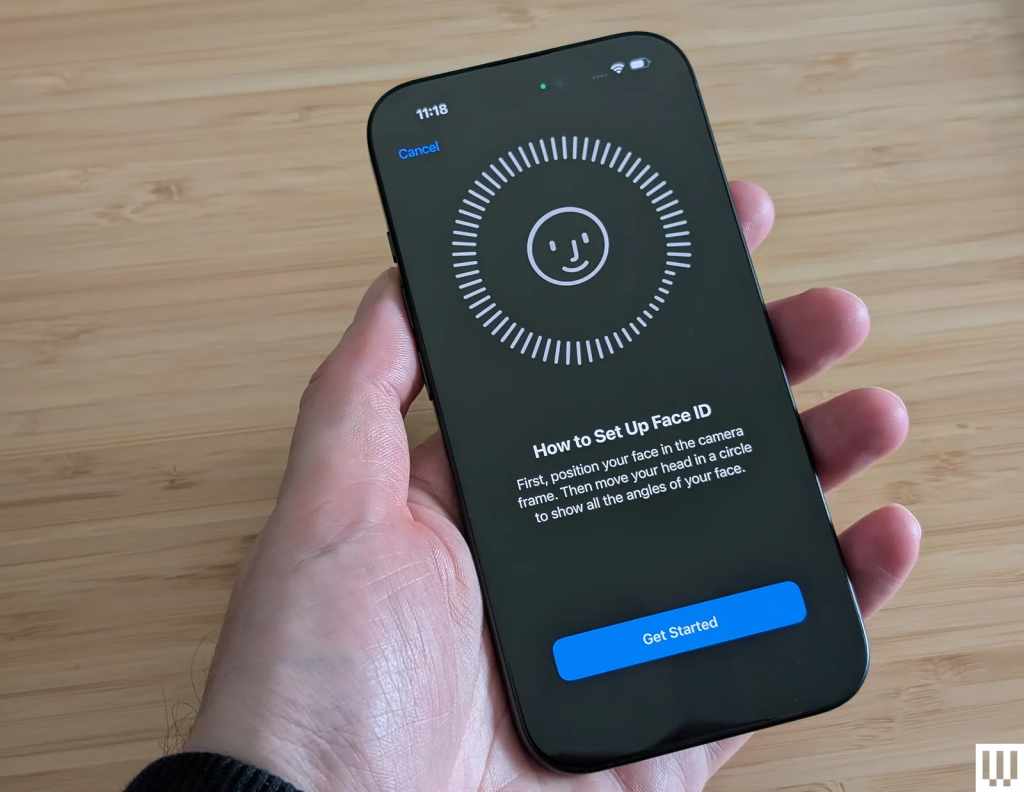
During setup:
- Position your face within the frame
- Move your head in a circular motion
- Complete the scan twice
You’ll also create a passcode. Choose something secure but memorable.
This protects:
- Apple Pay
- Passwords
- Notes
- Banking apps
- Personal photos
Security should never be rushed.
Step 5: Sign In With Your Apple ID
Your Apple ID connects your device to Apple’s ecosystem.
Once signed in, you gain access to:
- iCloud storage
- App Store downloads
- iMessage
- FaceTime
- Apple Music
- Apple Pay
If you don’t already have an Apple ID, you must create one to use the device fully.
Enable automatic updates to ensure your iPhone stays secure and receives the latest features.
Step 6: Configure Privacy and System Settings
Your new iPhone runs the latest version of iOS. During setup, you’ll see prompts for:
- Location Services
- Siri
- Screen Time
- Analytics sharing
- App tracking
You can adjust these later in Settings, but it’s smart to review them carefully now.
For better privacy:
- Limit app location access
- Disable unnecessary tracking
- Review which apps refresh in the background
Go to:
Settings → General → Background App Refresh
Disable apps you don’t need constantly updating.
This improves battery life.
Step 7: Set Up Apple Pay and Additional Features
You’ll be prompted to configure:
- Apple Pay
- Emergency SOS
- iCloud Drive
- Notification summaries
- Action Button customization (if available)
Apple Pay allows you to add debit or credit cards securely. It uses Face ID for authorization.
Emergency SOS lets you quickly contact emergency services by pressing the side button multiple times.
You can always return to these settings later.
Step 8: Customize the Essentials
After initial activation, take time to personalize your iPhone.
Add email accounts:
Settings → Mail → Accounts → Add Account
Enable battery percentage:
Settings → Battery → Toggle Battery Percentage
Turn on Focus Mode to reduce distractions:
Settings → Focus
This feature helps you silence notifications during work, sleep, or personal time.
Delete unwanted stock apps. Apple allows removal of many preinstalled apps. Clearing clutter improves organization and focus.
Step 9: Transfer From Android (If Switching)
If moving from Android:
- Download the Move to iOS app on your Android phone
- Select From Android during iPhone setup
- Enter the provided code
- Select data to transfer
You can move:
- Contacts
- Messages
- Photos
- Videos
- Calendars
- Email accounts
Using a USB-C cable between devices can speed up the transfer process.
Step 10: Explore New iOS Features
Your iPhone includes powerful tools worth exploring:
- Shortcuts automation
- App privacy reports
- Enhanced notification controls
- Camera settings customization
- Safari autofill preferences
For web form convenience:
Settings → Safari → Autofill
For automation:
Open the Shortcuts app and explore templates.
These small adjustments improve daily usability significantly.
Step 11: Prepare Your Old Phone
If upgrading, don’t forget your previous device.
Before selling or giving it away:
- Back it up one final time
- Sign out of your Apple ID
- Erase all content and settings
This protects your personal information.
Your new iPhone is now fully operational, personalized, and optimized for long-term use. Taking a thoughtful approach during setup ensures better security, smoother performance, and a more enjoyable experience from the very first day.


